Honeywell Thermostat Manual-T4 Pro
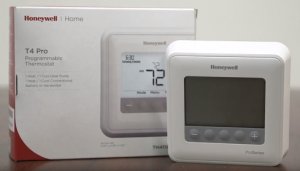
On the thermostat control, you will find the following:
- There is an Actual Time on the top left, below which, there is Schedule Information carrying all the time-based functions your therm will need to perform.
- On the top right, you have the System Status, which gives you information on the heat/cold status and much more we will talk about later.
- On the central display, you will find two temperatures, one is mentioned in a much smaller size than the one at the bottom. The one above measures the Indoor Temperature Setpoint and can be changed as you please with the Temperature/Navigation buttons. Below this, the number expressed in a much larger size measures the Actual Indoor Temperature.
- The +/- buttons that you will see on the therm make the Temperature/Navigation button that we were talking of earlier.
- Between the +/- buttons are 3 other buttons that we respectively call the Mode, the Menu, and the Fan buttons. The Mode is from where you can select the Heat/Cold/Off/Auto options. The Menu helps you pick from and play with the program schedule. In the Fan mode, you can choose On/Auto.
The same can be found on the T6 Pro.
Powering Up
If you want to turn on the screen, you will have to press the Select button and it will awake the screen.
Date Selection
In order to select the Date, start at the home screen with Menu. With the help of +/-, go to Date, and when you reach it, press Select. To pick the year you are in, which should be the current year, use the +/- buttons and press Select. This will take you to the Month, which can be fixed by the +/- buttons. Lastly, for the day, you can do it with the same buttons. Now, it’s Time to set the Time!
Time Selection and Clock Format Selection
You will have to start with Menu. In order to go to Time, you will need to press +. Now you will get Select. From here, you will need to press +/- to pick the 24-hour clock or the 12-hour clock. This will be your clock format. Press Select to confirm it. Then with +/- fix the hour you are on, and with the same buttons, you can fix the minute. Now, you can have it pressed at a stretch to increase the numbers fast. But, no funny pranks of tampering with the quantity or else your program can run wild!
Changing from Fahrenheit to Celsius
And, we have to be back at the Menu button. Pressing +/- you have to search for and pick F/C. Needless to say, what they stand for, but it’s Fahrenheit/Celsius. Now use the navigation buttons and pick F or C, whichever you are convenient in. Press Select and get out of there as saved.
Adjusting Brightness
This will only be displayed if you have connected the C wire or the Common wire. What you have to do is go to everyone’s momma, the Menu button. Pick Lite from the navigation options as you have picked so far. You’ll get a brightness bar from 1 through 5. Pick the level that best suits you, press Select, and you’re done.
Then there are these advanced bits:
System Operation
For this, you will need to press Mode from the home buttons. You will find the available system modes to be Off/Auto/Heat/Em. Heat and Cool. Navigate through them and when you find yours, pick and leave to activate.
Fan Operation
There are 2 fan modes you can pick from On and Auto. The auto one runs with the heat/cold system running, and the on one is always running. Just press the Fan button, look through the available Fan modes, and activate. On T6, however, you get Circ mode, which operates fans one-third of the Time.
Program Initiation
From the navigation that you’re used to till now, go to Menu and with +/-, pick Prog and press Select. You will have to pick from 4 options: Wake, Sleep, Home, and Away. At Wake, you’ll want the temperature as soon as you wake up and till you leave. Away puts the house in an energy-saving mode where the temperature is as you want to leave it. Home is the temperature that you wish to post-return until bedtime, and Sleep is what you want to overnight. You can set up to these 4 time periods and change them each day or on weekends only.
Adjustment of Program Schedule
Follow the sequence of Menu>Prog>Select, with the help of the +/- buttons; you will get the days whose schedule you want to edit, covering the weekdays and weekends. Press +/- to pick a day. You will find the 4 time periods. To enter into and edit them, press Select. It is already On, but if you don’t want to keep a schedule, press +/-, Off, and Select if you want to remove it. Considering you keep it On, you can first fix the start and stop Time with the +/- buttons and then the heating and cooling temperatures with the same and Select as you end each step. After you’re done fixing them for all the days, press Home, you’ll get a Save option before that, press it, and you’re set!
Permanent/Temporary Override
Of the current temperature, you can make a permanent/temporary change by pressing +. When the temperature starts to flash, edit it as you want, press Hold to get it saved.
Adjusting Lockout
We’ve already done an article on this, check that out!
Conclusion
We hope the instructions were clear on everyone’s favorite digital thermostat! Now, you can have it programmed as you wish. Have fun!


