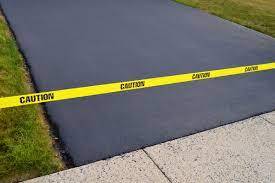
Driveway sealcoating is the process of applying an asphalt sealer on an asphalt driveway to help in filling and sealing small openings in a driveway to protect it from external elements. When left unsealed, wind, water, and sunlight can make your asphalt driveway oxidize and harden. This, in turn, can make it more brittle, thus leading to cracks. So, failing to sealcoat your driveway as required can lead to costly damages in the long run.
Sealcoating an asphalt driveway to protect it from harsh weather elements is a periodic rite for many homeowners. Typically, the job is done between September and October, when the temperatures are a bit cold, as sealcoating helps to protect asphalt-paved driveways from deicing chemical and salts, as well as from the frequent freeze and thaw cycle experienced during the winter season. Also, wind and sunlight can damage asphalt driveways in areas with warmer climates.
Now, considering the environmental and cost concerns, homeowners should ask themselves how important sealcoating is, and how regularly they should sealcoat their driveways.
How long should driveway sealcoating last?
Generally, driveway sealcoating should last around 3 – 5 years. Therefore, you should schedule sealcoating once within this period to keep your driveway in good condition, and improve the curb appeal of your property. However, it’s important to note that there is no definite time how long it should last since there are numerous factors that determine the longevity of driveway sealcoating. Some of these factors include:
The quality of the sealer used
The quality of the asphalt sealer used has a direct impact on how the sealcoating will last. In case the sealer has a few solids, that is, it’s watery, then it won’t last long. Therefore, it’s important to specify the kind of sealer you want—and you can only get such a sealer from reputable driveway sealcoating companies.
Proper sealcoat mix
A well-mixed asphalt sealcoat should have sand, as well as polymer additives. Now, this is very important, as it ensures that the driveway has enough traction for both vehicle and foot traffic. Besides, sand adds an extra durability to the sealcoating. So, ensure that you specify that your contractor uses sand when sealcoating your driveway.
Number of coats
Sealcoating projects require at least two coats of a sealer in order to achieve the best sealcoating results. However, it’s important to allow the first coat to dry well before applying the second one. Then, you should give the second coat at least 24 hours to cure before opening your driveway to the traffic.
Amount of sealer applied
Just like the number of sealer coats applied, the amount of sealer used for each coat greatly determines how long the sealcoating will last. During the sealcoating project, it’s important for the contractor to follow the manufacturer instructions to achieve the best results.
Traffic
How frequently traffic accesses your driveway has an impact on how long your sealcoating job will last. High traffic volumes can make your sealer wear out faster. Because of this, most contractors normally recommend three coats for driveways with high traffic volumes.
Geographic area
The Tampa experts from CSG Sealcoating say that sealants applied in areas with extremely hard climates have a shorter lifespan. The frequent freeze and thaw cycles, as well as high moisture levels and high temperature can affect the durability of the driveway sealer.
Here are a few benefits of driveway sealcoating. Please note that you can only enjoy these benefits if you sealcoat your driveway properly. These benefits are:
- Sealcoating your driveway helps to prevent hardening and crumbling, thus extending its lifespan
- Sealcoating creates a uniform and attractive coat over your driveway, especially when all the potholes and cracks are filled properly before the sealer is applied
- Sealcoating your driveway will protect is from moisture, salts, and chemicals, which can cause costly damage to your driveway
- It’s very easy to sealcoat your driveway using sprayers or squeegees. This is something most homeowners can do, so long as they like DIY projects. That means, there’s no need of hiring a contractor to do the job.
- Sealcoating is a pocket-friendly way of resurfacing or repairing an existing driveway, thus helping to extend its lifespan.
After sealcoating your driveway, give it around 36 – 48 hours for the sealer to set and cure. Also, depending on the manufacturer’s instructions, make sure that you apply the sealer when the temperatures are optimum for the project, as this will determine the success of the project.
With that said, let’s look at the top asphalt sealcoating tips, which will ensure the durability of the sealer:
- When sealcoating a large driveway, consider spraying, rather than using squeegees
- You have the option of mixing sand with the sealer to provide more consistency to the sealer, and make your driveway non-slippery
- When cleaning your driveway, use pressure washer to clean all the cracks, and get rid of all the vegetation and debris in the cracks
- Make sure that you clear all the oil stains in your driveway before you start the sealcoating process
- You can use your sealer to cover cracks that are less than 1/8 inch. However, you shouldn’t use it to fill larger or wider cracks. Make sure that you repair these cracks and any other damage on your driveway before applying the sealer. You can use rubberized crack sealer to repair such cracks


